Kup stronę 60% Taniej
BLACK MONTH
BLACK MONTH
Do końca 2 DNI : 2 GODZIN : 2 MINUT : 2 SEKUND

Categories.
![]()
WebWave drag and drop website builder lets you create unique websites. You can build your website from scratch by starting with a blank page, or choose various website templates from our free collection and modify them according to your needs. With WebWave website builder, you have a complete website design and hosting system at your fingertips.
This website was created with WebWave.
Find us online
Contact.
Email us at:
contact@webwave.me
Or use the chat (Mon-Fri)
Website builder.
Offer.
Useful articles.
How to add a photo with before/after effect
Juxtaposte is a tool that will allow you to prepare a photo with a "before and after" effect with a slider to scroll the view yourself. In the guide below, I will show you how to easily install a plug-in on the website.
How to create and add a Juxtaposte photo
- Open your website builder and go to Settings -> My images and files, and copy the URL of the selected photo:
IMPORTANT - try to choose photos with the same size, the effect works best when the photos have the same or very similar resolution.
- Go to the JuxtaposeJS website and press the big green button "Make a Juxtapose"
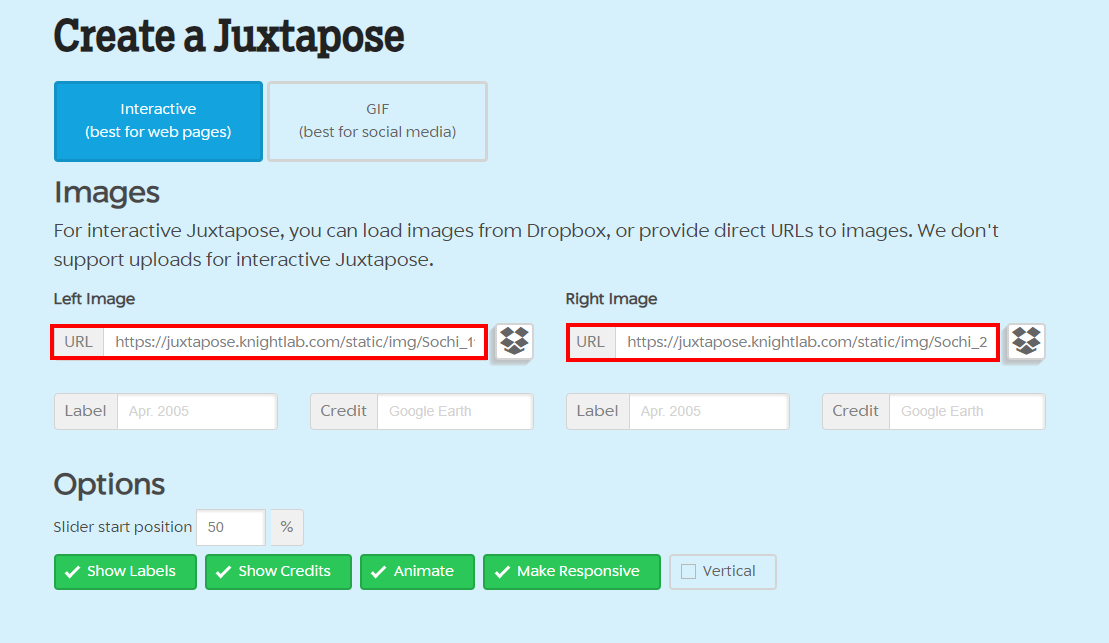
- The page will redirect you directly to the parameters of the tool. In the place for the link, paste the URL links to the images copied from website builder (step 1), you can also set your own parameters (e.g. changing the orientation of photos to vertical - "Vertical"):
In the photo below, you can control the appearance that the image will have after publication.
- Once you have decided what your sliding photo should look like, press the "Publish" button and copy the code generated in the bottom window:
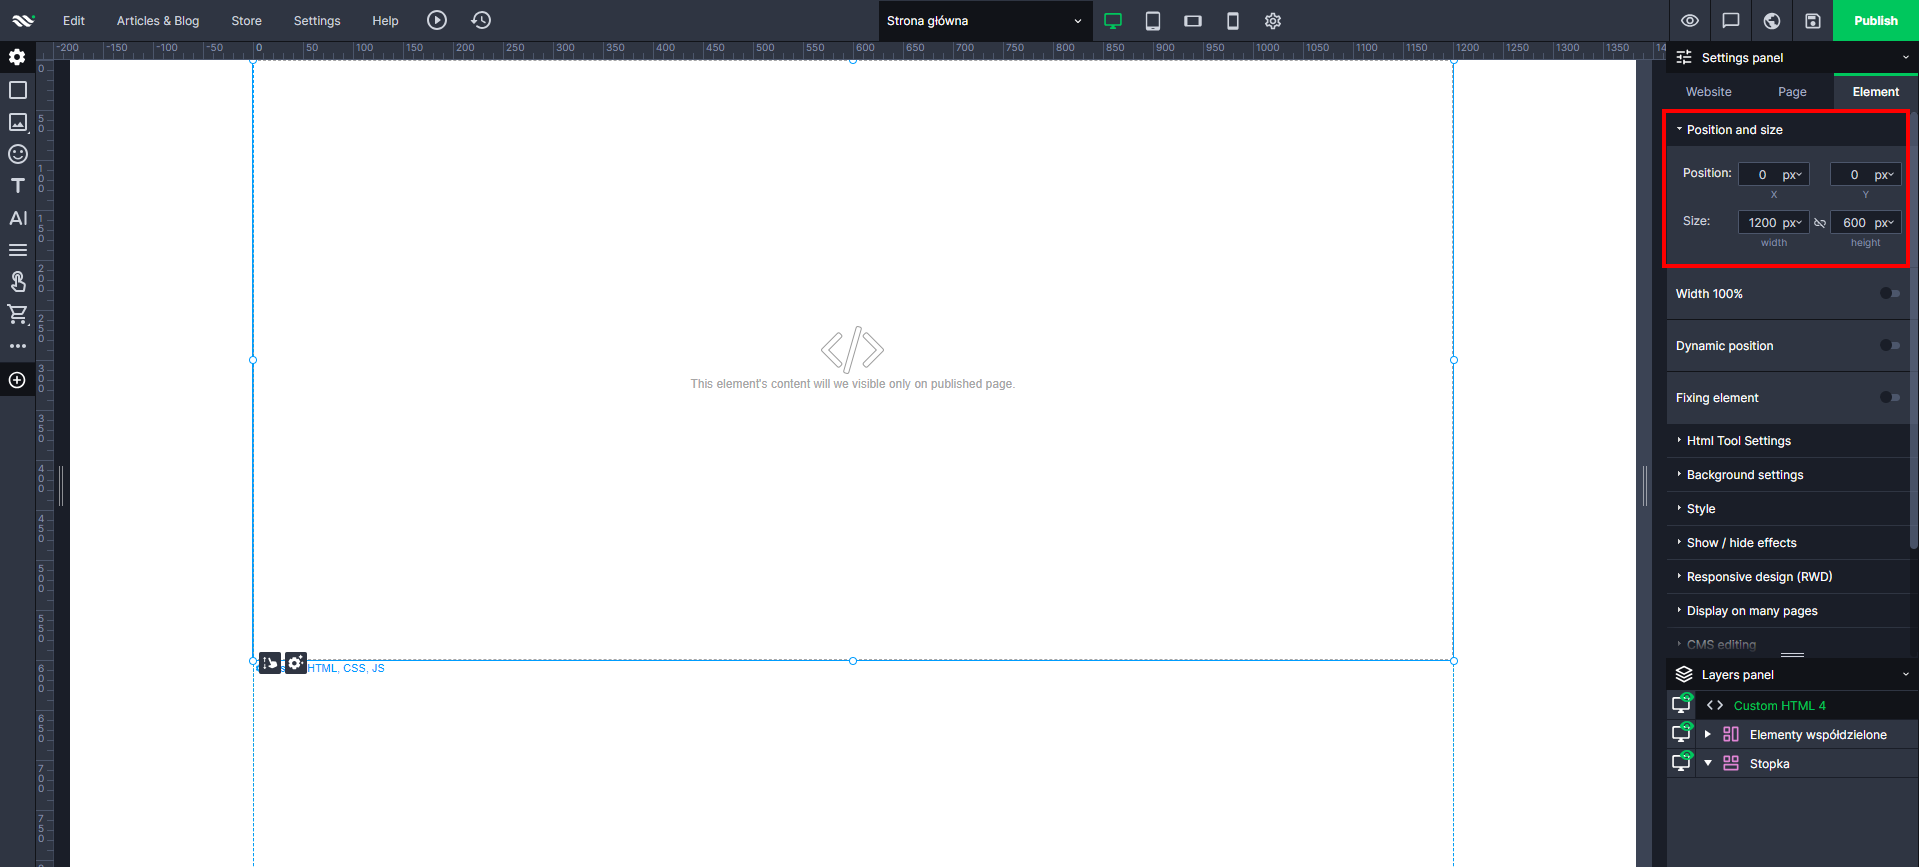
- Go back to the website builder, and then paste the copied code into the new HTML element. You can also make sure that the field of the inserted HTML element has the same resolution as the photos from which we created the code (for example 1280x720):