Kup stronę 60% Taniej
BLACK MONTH
BLACK MONTH
Do końca 2 DNI : 2 GODZIN : 2 MINUT : 2 SEKUND

Categories.
![]()
WebWave drag and drop website builder lets you create unique websites. You can build your website from scratch by starting with a blank page, or choose various website templates from our free collection and modify them according to your needs. With WebWave website builder, you have a complete website design and hosting system at your fingertips.
This website was created with WebWave.
Find us online
Contact.
Email us at:
contact@webwave.me
Or use the chat (Mon-Fri)
Website builder.
Offer.
Useful articles.
Configuration of your mailbox in MacOS & iOS
To configure mail set up in the WebWave website builder in macOS, use the following mail client configuration:
Configuration of your mailbox in MacOS.
1. Open mail program on your MacBook.
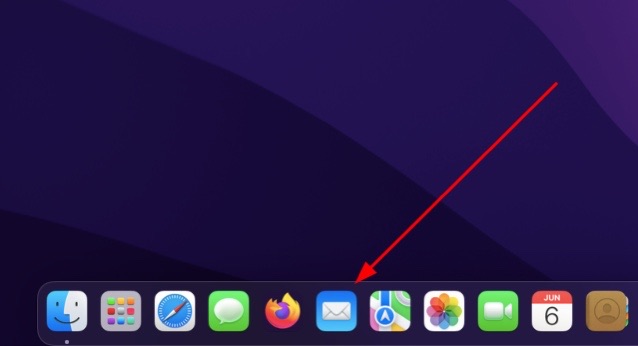
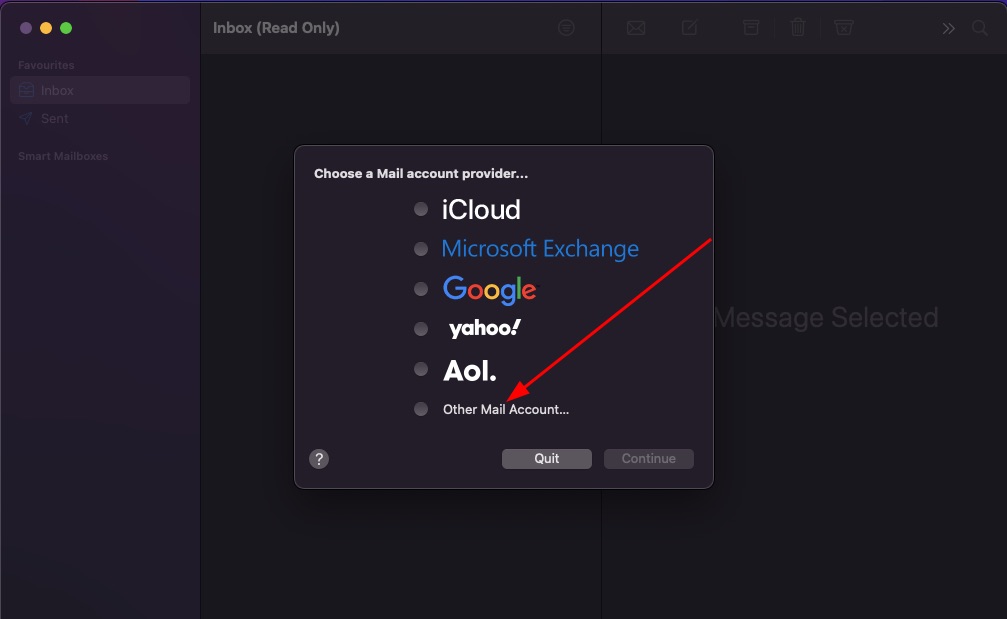
2. Choose your e-mail provider, in this situation click "Other Mail Account...".
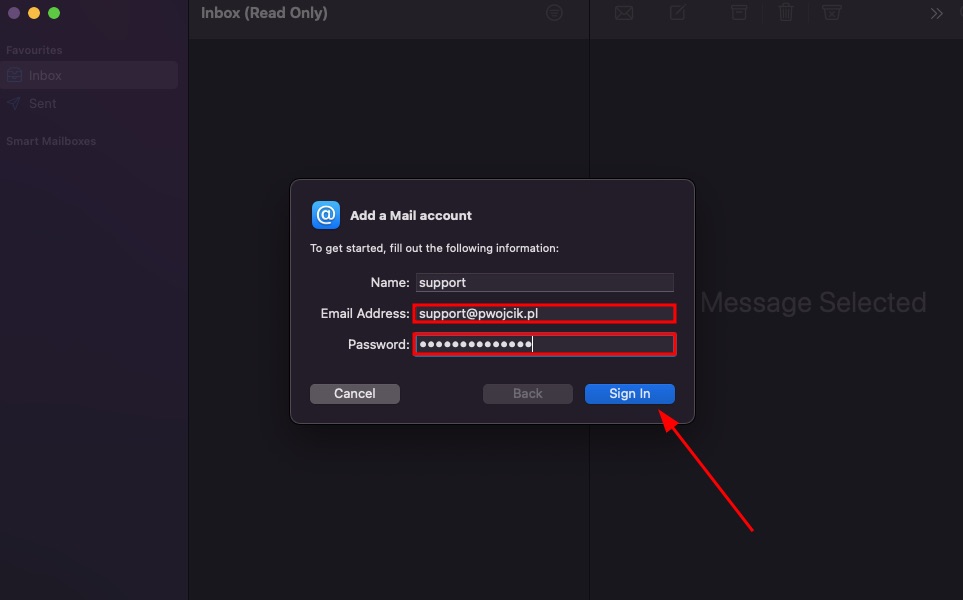
3. To start the set-up, enter your email address and password in the fields below. Then click "Sign In".
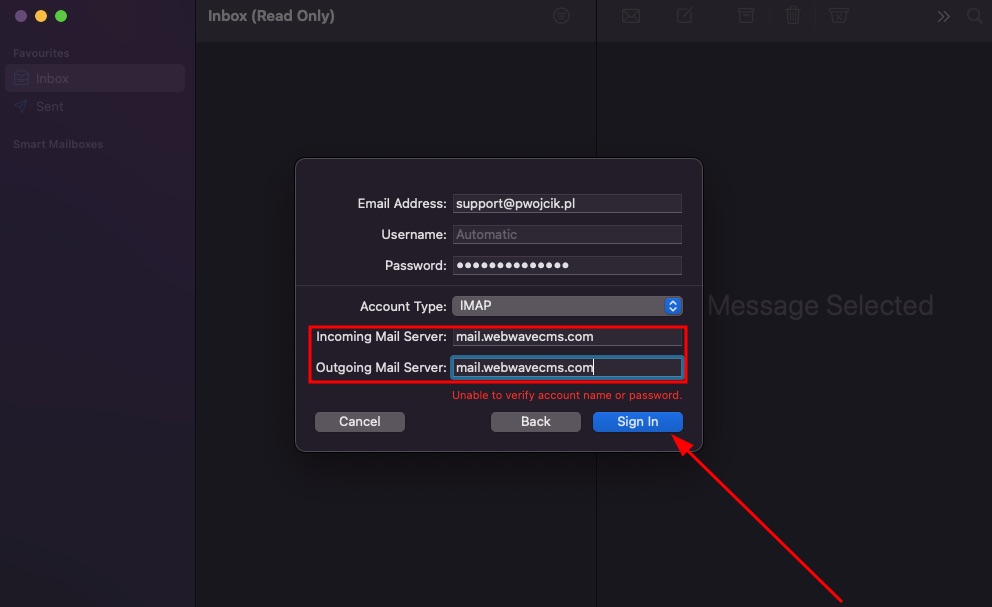
4. The next configuration step will be to fill in the fields responsible for sending and receiving messages:
Incoming Mail Server: mail.webwavecms.com
Outgoing Mail Server: mail.webwavecms.com
After filling in the fields, click "Sing in".
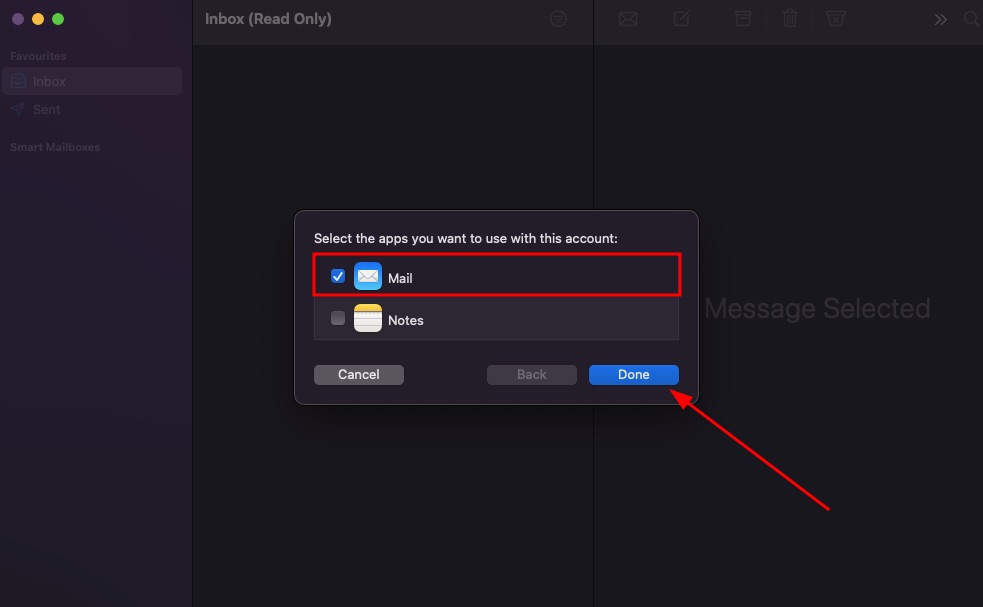
5. Select the applications you will use through this account. Click "Done".
6. In the next step,select the first protection option.
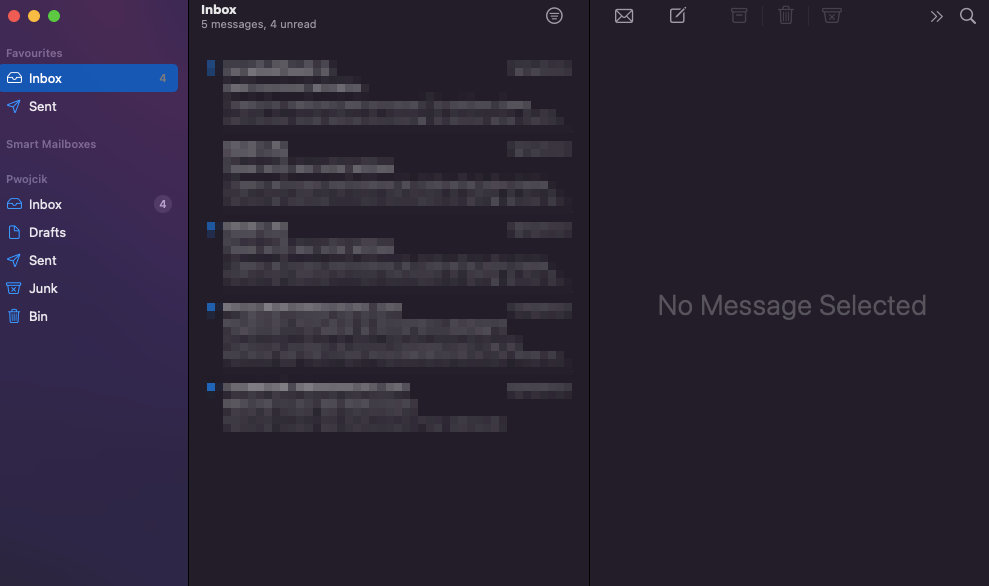
7. Congratulations! Your mailbox has been correctly added!
Configuration of your mailbox in iOS.
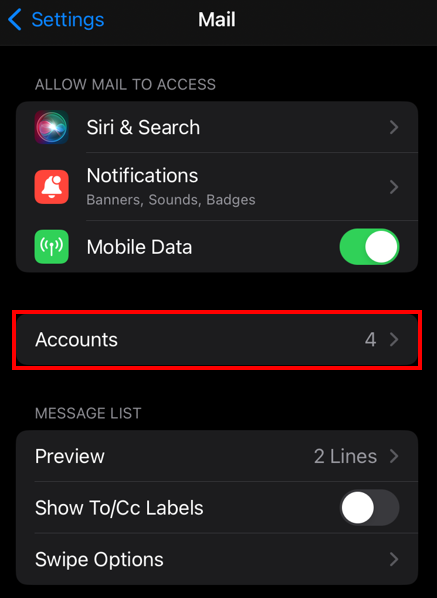
1. Go to mail settings on your device, then click "Accounts"
Path: Settings -> Mail
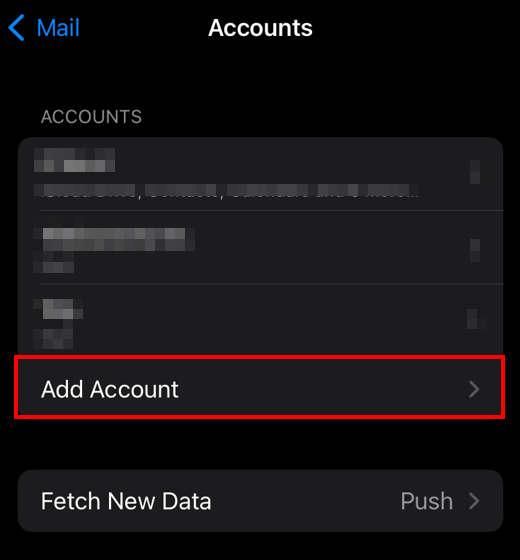
2. Click "Add Account".
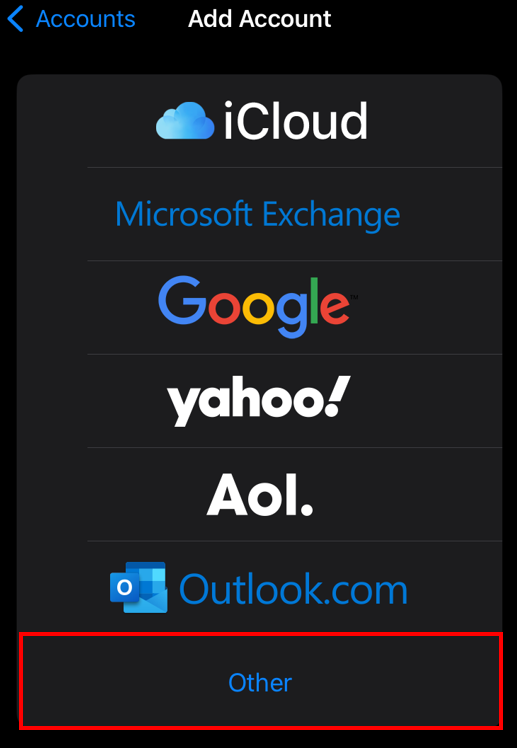
3. In the "Add Mail Account" tab, choose "Other" option.
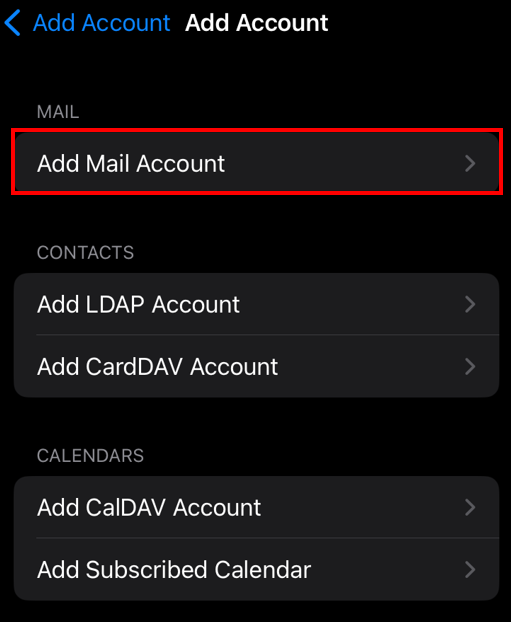
4. Choose "Add Mail Account" option.
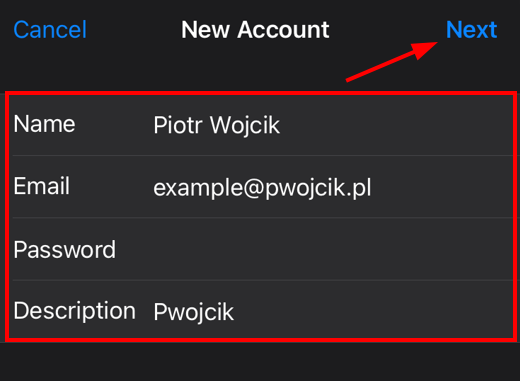
5. Fill in all the fields, then click "Next"
Name - the name of your account
Email - your WebWave email.
Password - your WebWave email password.
Description - fill in the description optionally.
6.The next step of configuration will be to fill in the fields responsible for sending and receiving messages and fill in the fields:
Username - enter your WebWave email address.
Password - enter your WebWave email password.
Then fill in the fields:
Incoming Message Server / Incoming Mail Server: mail.webwavecms.com
Outgoing Message Server / Outgoing Mail Server: mail.webwavecms.com

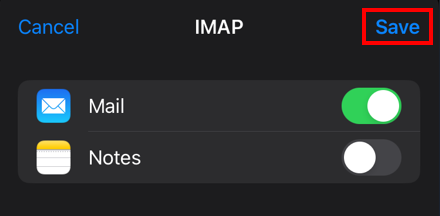
7. Wait for verification and then select "Mail" and click "Save"
8. Congratulations you have added your mail created in WebWave to your iOS device.