Kup stronę 60% Taniej
BLACK MONTH
BLACK MONTH
Do końca 2 DNI : 2 GODZIN : 2 MINUT : 2 SEKUND

Categories.
![]()
WebWave drag and drop website builder lets you create unique websites. You can build your website from scratch by starting with a blank page, or choose various website templates from our free collection and modify them according to your needs. With WebWave website builder, you have a complete website design and hosting system at your fingertips.
This website was created with WebWave.
Find us online
Contact.
Email us at:
contact@webwave.me
Or use the chat (Mon-Fri)
Website builder.
Offer.
Useful articles.
Gallery
In website builder WebWave a Gallery element allows you to add to your website a photo gallery. In this article you will learn how to build a website with a gallery.
Gallery settings
Set photo title and description
Add gallery to your website
In order to add a gallery to your website, click on the Image icon in the toolbar on the left side of the builder, drag and drop the gallery icon to your website.

There will be added some default photos in the gallery . You can easily change them in the "Change images" section.
Animation
The way one picture changes to another:
- Slide - a current photo will move to the side and be replaced by a new one.
- Fade- a current photo will fade away and a new one will take its place.
- Crossfade - a current photo will smoothly change to a new one.
- Explosion – a current photo will be divided into many pieces, change to a new one and go back to being whole.
- Windmill – a current photo will be divided into four pieces, which move in different directions and reveal a new photo.
- Door– a current photo will be divided into four pieces, which move on sides and reveal a new photo.
- Tils – a current photo will be divided into four pieces, which fall and reveal a new photo.
Crop type
Adjust how photo fits the gallery frame:
- Fit - a whole photo fits the gallery frame. There might be left some empty spaces in the frame.
- Crop - a photo fits the whole gallery frame. There are no empty spaces in the frame, but some parts of the picture might get cropped.
- Stretch - a photo gets unproporctonally streched so it fits the whole frame. There are no empty spaces in the frame and no parts of the picture get cropped.
Animation duration time
Shows how long it takes in seconds for one photo to change to another.
Delay
Shows for how long in seconds a photo is displayed before it changes.
Auto play
Shows whether photos should change automatically or after a user's click.
Additional settings
There are some additional settings in the Gallery settings section:
- Title and description - should a title and description of a photo be displayed
- Thumbnails - should photos thumbnails be displayed and, if so, where.
- Width and height - set width and height of photos thumbnails.
- Arrows - should navigation arrows allowing a user to move around gallery be displayed.
- Distance from edge - set arrows' distance from gallery edge.

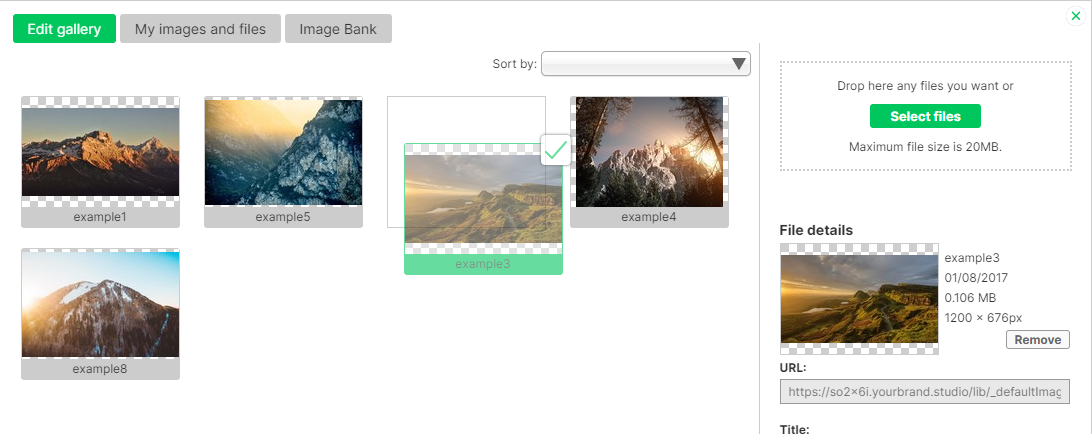
Add photos to gallery
In order to add photos to gallery, click on it. Expand Gallery settings and click on "Change Images" button

Photos are added to gallery through media library. At the top of a new window select "Media library", choose photos which will be in your gallery and press "Add to gallery" button at the bottom of the window.
More about media library read here.
Frame the activate image
You can frame the image according to your needs

Remove photos from gallery
In order to remove photos from gallery, click on it and select "Change Images".
Choose a photo you want to delete and in the file details select "Remove".

Change photos order
In order to change photos order in gallery, click on it and select "Change Images".
Drag a photo and drop it in a place where you want it to be.
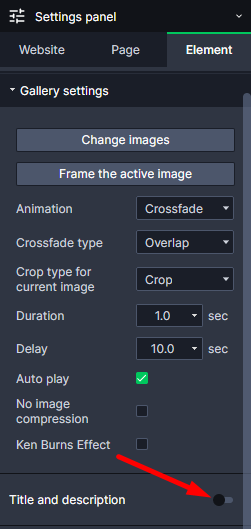
Set a photo title and description
- Click on your gallery
- In the side edition panel select "Gallery settings".
- Tick the "Title and desc" box.
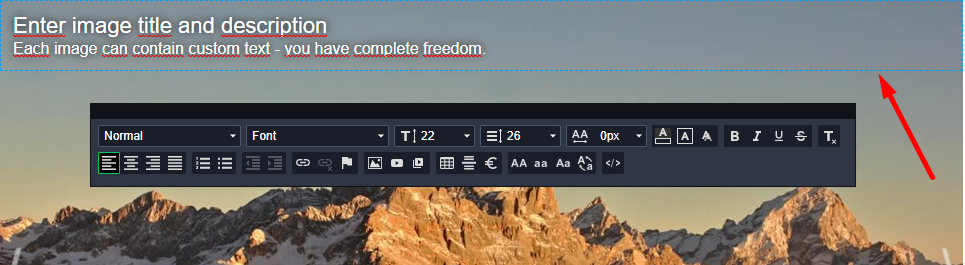
- Double click the text field on the photo.
- Enter any text content and edit its style just like in any other text element.
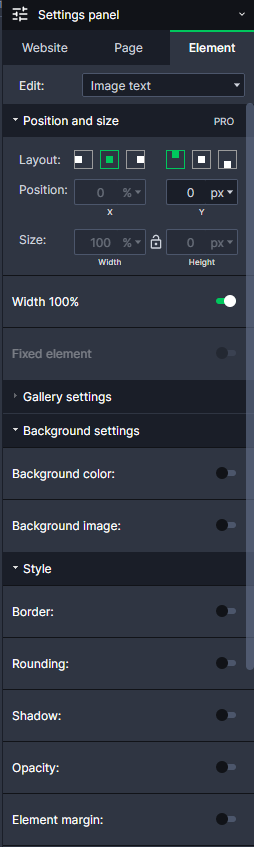
- In the Settings panel you can set a text alignment on the photo, a text background color, a text, element transparency and more.
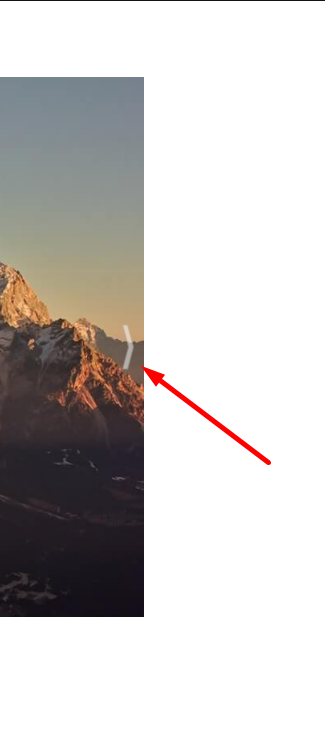
- To edit the next photo just click on the navigation arrow in gallery.