Categories.
WebWave drag and drop website builder lets you create unique websites. You can build your website from scratch by starting with a blank page, or choose various website templates from our free collection and modify them according to your needs. With WebWave website builder, you have a complete website design and hosting system at your fingertips.
This website was created with WebWave.
Find us online
Useful articles.
WebWave Shopping Cart - A simple and free way of taking orders from customers
How to enable the WebWave cart?
How to set up product variants?
How to enable shipping of your products?
How to add "Terms and Conditions" of your shop?
How to enable the WebWave cart?
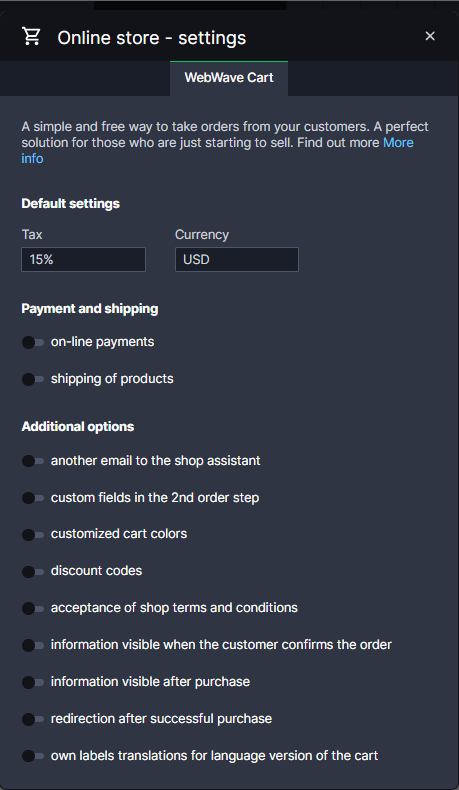
- In order to add the WebWave cart on your website, you would need to enter the store settings available in the settings section on the top bar.
- Then turn on the cart and configure currency ( you may set up one among 19 currencies available: AUD, BGN, CAD, CHF, CZK, EUR, GBP, HRK, HUF, INR, JPY, NOK, PLN, RON, RUB, SEK, UAH, USD), tax amount (one may set up a default tax amount for every new added product), another email to the shop assistant and additional information visible during the ordering process.
How to add a product?
-
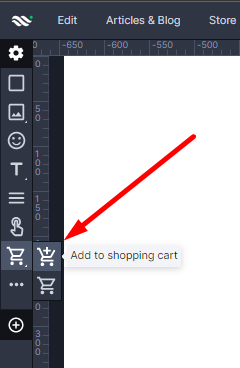
To add a product, just click the basket icon (with a plus) on the left-side bar of the creator and then fill in the product details.
-
Fill in the fields for your product
How to connect payments?
When using the WebWave shopping cart, you have the option of choosing Stripe as a payment provider. If you want to find out more about the offer specifications, read our post on this topic.
How to set up product variants?
Adding product variants allows you to sell your product in different sizes and colors without any need of creating a separate article for each variant.
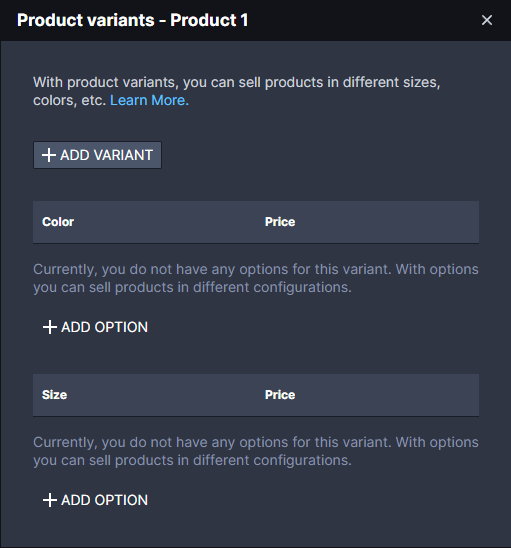
You may add variants while editing the product by pressing "more options" button and choosing "manage product variants".
For example we are running a clothing store and we would like to enable our clients making purchases in S, M, L sizes and green and black colors. In this case we have to add 2 variants - Size and Color. Then to each variant we are adding an option with the appropriate values. In addition, the creator allows to add price differences, it means that if we want a green shirt to be 10$ more expensive than the black one, we have to enter 10 in the field.
How to enable shipping of your products?
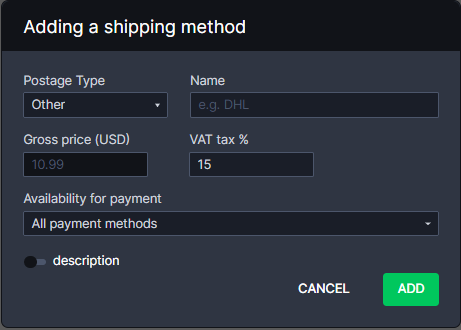
The opportunity of shipping your product is a big asset. Some clients would want to recieve the product straight from a delivery guy, the others - by post. Webwave cart allows to set every shipping form. You just click the "shiping of products" button in the shop settings and after input name, gros price and VAT (description is optional).
How to add "Terms and Conditions" of your shop?
Before completing an order a client should learn about terms and conditions concerning the payment: return, shipping, commitments of both parties and etc. Thanks to this option client will have to accept terms and conditions before purchase.
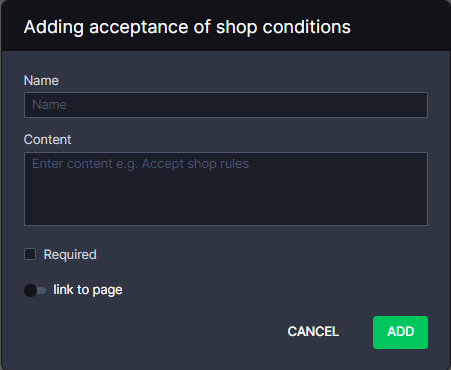
Turn on "acceptence of shop terms and conditions" in the shop settings and add it. Then you will see the following communicator:
Name shows up in our settings and client will not see it.
Content will show up when finalising the purchase. If you would like to add a link leading to terms and conditions, it is worth providing information about it, so clients know that by going on this link, they will open terms and conditions.
Required subpage which might lead a client to terms and conditions.

